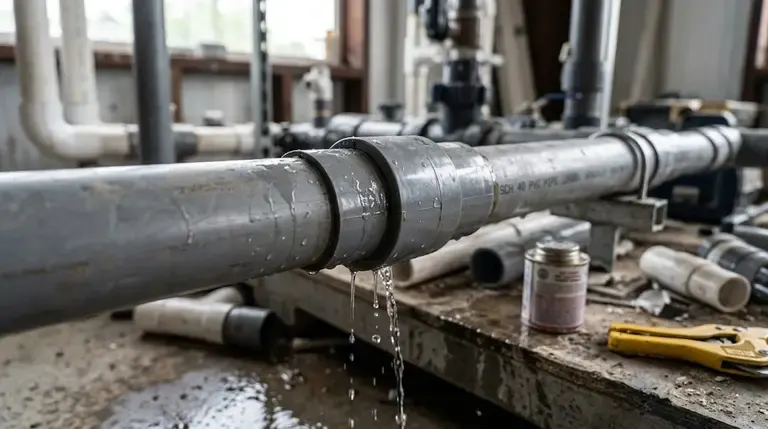
A PVC pipe joint leak is rarely caused by a defective pipe itself. In most cases, the issue results from improper joint installation rather than the pipe material. PVC solvent cement joints depend on a precise chemical bonding process, and missing even one step can create a connection that appears secure at first but begins to leak water weeks or months later.
This guide walks through the specific application mistakes that cause most PVC pipe joint leak problems on Pakistani plumbing, drainage, and irrigation projects, and exactly what correct technique looks like at each step.
Why PVC Solvent Cement Joints Fail More Often Than They Should
Solvent cement jointing isn’t glue in the way most people picture it. It’s a chemical welding process: the solvent in the cement softens and partially dissolves the surface layers of both the pipe and the fitting, and as the solvent evaporates, those softened surfaces fuse into a single, continuous piece of PVC. Done correctly, the joint becomes as strong as the pipe itself. Done incorrectly — with a rushed step, the wrong cement, or a dirty surface — the fusion is incomplete, and an incomplete fusion is where leaks start.
The failure often isn’t immediate. A poorly made joint can hold static pressure for weeks before a pressure surge, ground movement, or thermal expansion finally reveals the weak bond — which is exactly why application mistakes are so costly to catch after installation is complete.
Mistake #1: Skipping or Rushing the Priming Step
Priming fluid isn’t optional, even though it’s the step most commonly skipped on site to save time. Primer removes the glazed, factory-smooth surface layer on PVC pipe and fittings and cleans away manufacturing residues, allowing the solvent cement to actually penetrate and soften the material underneath. Without proper priming, cement applied straight onto a glazed, unprepared surface may look like it’s bonded, but the fusion never properly reaches into the PVC wall — producing a joint that’s mechanically weak from day one, even though it may briefly hold water under low pressure.
Mistake #2: Applying Too Little (or Too Unevenly Spread) Cement
The cement needs to fully fill the gap between the pipe’s outer surface and the fitting’s inner socket wall — that gap is exactly why PVC fittings are manufactured with a slight interference fit in the first place. Applying a thin or patchy coat leaves voids in the joint that solvent alone can’t bridge. The correct approach is a generous, even coat on both the pipe and the fitting socket, applied quickly enough that both surfaces are still wet when the joint is assembled.
PVC Pipes & Fittings
NewTech Pipes · PVC Piping Systems
A good solvent joint starts with good pipe and fittings. See NewTech PVC for plumbing and drainage runs.
View ProductMistake #3: Not Allowing Proper Cure Time Before Pressure Testing
A solvent cement joint develops its full strength gradually, as the solvent fully permeates and evaporates from the joint — not the moment the pipe is pushed into the fitting. Pressure-testing or putting a joint into service before it has properly cured is one of the most common causes of early-life leaks on Pakistani sites, especially where a contractor is under time pressure to complete a section before backfilling a trench. Manufacturer technical data sheets specify cure times that vary with pipe diameter, ambient temperature, and humidity — as a practical rule, larger-diameter joints and cooler weather both call for longer cure times before any pressure is applied.
Mistake #4: Poor Pipe Preparation — Dirty, Wet, or Poorly Cut Ends
Solvent cement bonding depends entirely on clean contact between two properly prepared surfaces. Common site-level preparation failures include:
- Cutting pipe with a rough or angled edge instead of a clean, square cut
- Leaving burrs on the cut edge that prevent full socket insertion
- Assembling a joint while the pipe surface is still wet, dusty, or oily
- Skipping the dry-fit check to confirm the pipe seats correctly in the fitting before cement is applied
Each of these seems minor individually, but any one of them can compromise the bond enough to create a slow leak that only shows up once the line is pressurized or the trench is backfilled and no longer easily accessible.
Mistake #5: Using the Wrong Cement for the Application
Not all PVC solvent cement is interchangeable. Cements formulated for pressure-rated pipe systems are designed with the viscosity and gap-filling properties needed for pressure-fit joint geometry, while non-pressure cements are formulated for drainage and non-pressure applications where the fit and mechanical demands are different. Using a non-pressure cement on a pressure-rated water supply joint — a substitution sometimes made simply because it’s what’s available on site — can produce a joint that holds initially but fails once the line is pressurized. Always confirm the cement is rated for your specific application (pressure vs non-pressure) and is compatible with the pipe standard your PVC is manufactured to.
Common PVC Joint Mistakes at a Glance
Mistake | Why It Causes Leaks | Correct Practice |
Skipping primer | Cement can’t properly soften a glazed, unprimed surface | Always prime both spigot and socket before applying cement |
Too little cement | Gap between pipe and fitting isn’t fully filled | Apply a generous, even coat matching the joint gap |
No cure time before testing | Joint hasn’t reached full strength, fails under pressure | Follow manufacturer cure times before pressure testing |
Dirty or wet pipe ends | Contaminants block proper solvent bonding | Clean, dry, and deburr every joint surface before assembly |
Wrong cement type | Non-pressure cement can’t hold pressure-rated joints | Match cement type to pressure vs non-pressure application |
How to Get a Reliable, Leak-Free Joint Every Time
- Cut the pipe square and deburr the edge before doing anything else.
- Dry-fit the pipe into the fitting to confirm proper seating.
- Clean and prime both the pipe end and the fitting socket.
- Apply an even, generous coat of the correct cement type to both surfaces.
- Assemble the joint promptly while both surfaces are still wet, and give it a quarter-turn to spread the cement evenly.
- Hold the joint steady for the initial set time specified by the manufacturer, then allow full cure time before pressure testing or backfilling.
Following this sequence consistently — rather than treating any single step as optional under time pressure — is what separates a joint that lasts the life of the system from one that becomes a callback.
Not sure a solvent-cemented joint suits your project? See our guide to compression fittings vs threaded fittings for small-diameter pipe.
Conclusion
Leak-free PVC solvent cement joints come down to discipline, not difficulty — priming properly, applying enough cement, preparing pipe ends correctly, using the right cement for the application, and allowing full cure time before the joint is put under pressure. Skipping any one of these steps under time pressure is the single biggest cause of preventable leaks on Pakistani plumbing and drainage projects. Newtech Pipes, an ISO 9001:2015-certified and PSQCA-registered manufacturer of UPVC and PVC piping systems in Pakistan since 2000, recommends following manufacturer jointing guidance closely to get the full service life out of every pipe run.Need help choosing the right pipe and jointing method? Get a quote from our team.