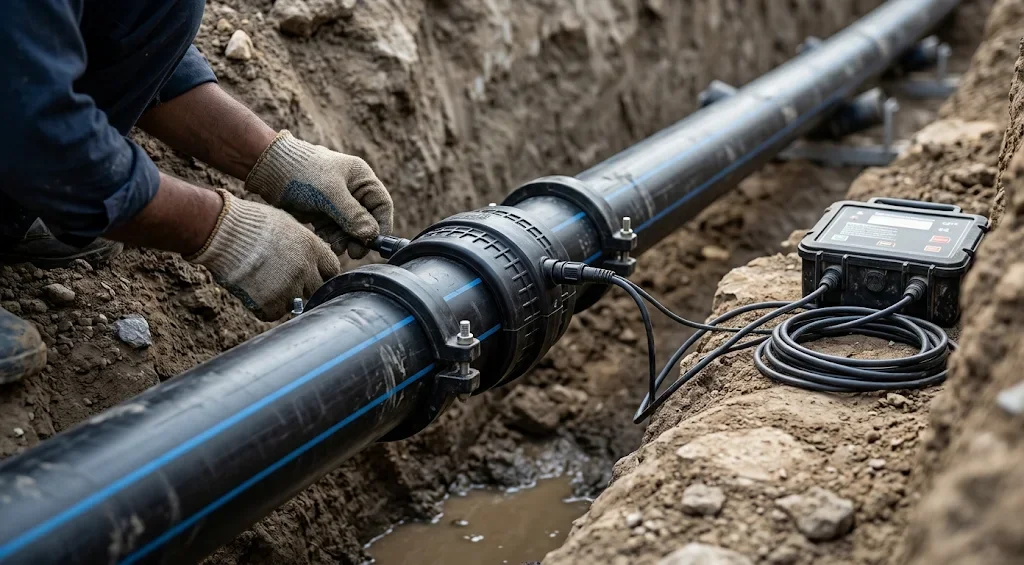
It is two in the afternoon in July. An excavator bucket has just clipped a buried 110 mm HDPE water main, and the trench is filling with muddy water. The damaged section has to come out and a new piece has to go in, but the trench is too narrow to swing a butt-fusion machine, and nobody wants to shut the supply for a day to dig it wider.
This is where electrofusion earns its place. It is the joining method built for awkward jobs: repairs, tie-ins, branch connections and tight spaces. It does not replace butt fusion, which is still the better choice for long runs of matching pipe. This guide explains how electrofusion fittings work, when to choose them, how to make a joint that holds, and why a joint that looks fine can still fail.
For Newtech’s range, our HDPE page lists butt-fusion fittings from 63 mm to 630 mm, and our butt-fusion machines are designed for the same range.

The short answer
Use electrofusion fittings when the joint has to be made in place: repairs, tie-ins and closure joints, branch connections, tight trenches or pits, and pipes whose walls do not match. Use butt fusion for long runs of same-size, same-wall pipe that you can line up in a machine, because it needs no fitting per joint. Many HDPE projects use both: butt-fused strings for the main run and electrofusion couplers at the tie-ins. Our butt-fusion guide reaches the same rule of thumb, and our post on compression vs butt-fusion fittings covers the small service connections where neither is needed.What electrofusion is and how it works
An electrofusion fitting has a heating wire moulded into its bore. A control unit sends a measured electric current through that wire, the wire heats, and the surface of the pipe and the inside of the fitting melt together. The melt expands in the narrow gap between them, pressure builds, and the two parts fuse into one. Once the heating time ends, the joint must cool undisturbed. The Plastics Industry Pipe Association of Australia (PIPA) describes the cooling phase as critical to a strong joint. Three features make electrofusion different from other methods:- The fitting controls the heat. The control unit scans a barcode on the fitting, or reads its data, and sets the voltage and time. Some fitting makers publish barcode times with built-in temperature compensation; one maker states that its barcode times suit jointing from −30 °C to +50 °C, while its fixed embossed times suit only about −5 °C to +23 °C.
- No machine holds the pipe ends. Clamps keep the pipe and fitting aligned, so the joint can be made where a butt-fusion carriage cannot go.
- The control unit cannot see the pipe surface. It will report a finished cycle whether or not the pipe was properly prepared. That moves the quality risk from the machine to the preparation, which is why most electrofusion failures start there.
The main types of electrofusion fitting
- Join two pipe ends in a single socket, usually with a centre stop so each pipe enters to the right depth.
- Repair (slip) couplers. Have no centre stop, so they can slide over a pipe to close a gap where a damaged section has been cut out. Some makers publish a method for turning a standard coupler into a repair coupler by cutting off the stops. Do that only if the maker’s instructions allow it, and without damaging the heating element.
- Elbows, tees, reducers and end caps. Change direction, make a branch, change size or close a line.
- Saddles and tapping tees. Fuse onto the side of an existing pipe to make a branch. They need a calibrated top-loading clamp to apply the right force, and the live main should be tapped only after the fitting has cooled and been leak-tested.
- Large-diameter couplers. The biggest sizes use a three-stage cycle of warm-up, soak and weld. One maker’s 450 to 630 mm couplers need a matching control box and a generator able to deliver at least 4.8 kW constantly, which in practice means a generator of about 7.5 to 10 kVA.
Electrofusion vs butt fusion, side by side
| Electrofusion | Butt fusion | |
| How the joint is made | Heating wire inside a fitting melts pipe and fitting together | Heater plate melts two pipe ends, which are pressed together |
| Fitting per joint | Yes | No |
| Equipment | Control unit, clamps, scraper, generator or mains power | Fusion machine with heater plate, facer and clamps |
| Space needed | Little; works in trenches, pits and against walls | Needs room for the carriage and travel to pull the ends together |
| Pipes with different wall thickness | Possible within the fitting’s range | Should be same diameter and same wall thickness (PIPA guidance, as summarised by a supplier) |
| Checking the joint | Fusion indicators show the cycle ran; they do not prove quality | A visible, even bead can be inspected |
| Where the risk sits | Surface preparation, clamping, power | Facing, alignment, heating and cooling |
| Best for | Repairs, tie-ins, saddles, small or awkward joints | Long straight runs of larger pipe |
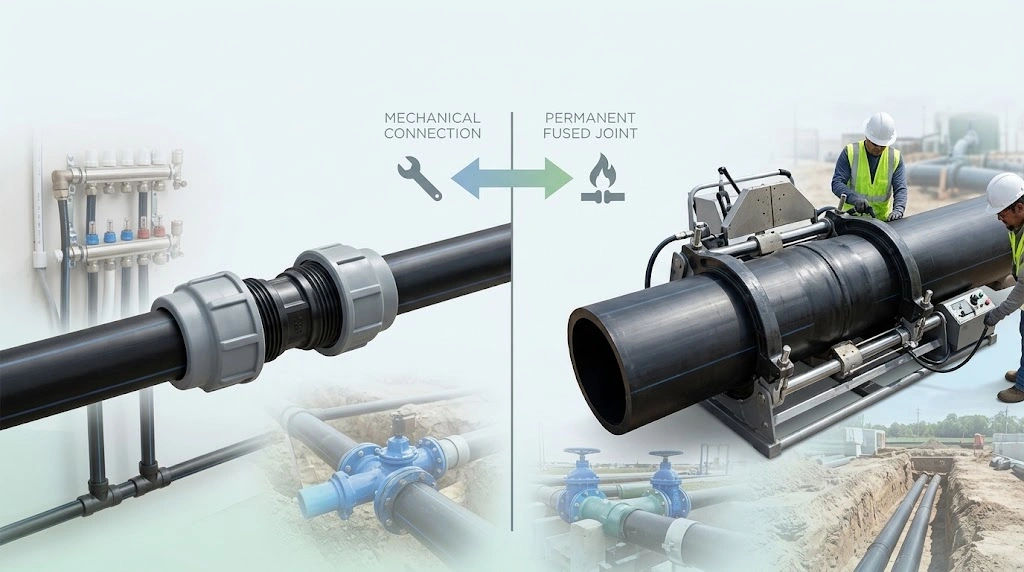
HDPE Joint Methods Compared
NewTech Pipes · HDPE Piping Systems
Choosing a joint? See how compression and butt-fusion fittings compare by pipe size, pressure and permanence, then decide where electrofusion fits.
Read GuideWhen electrofusion is the better choice
- Repairs on a damaged line. Cut out the damaged section, fuse in a replacement piece and use repair couplers at the ends. No pipe has to be moved far enough to fit in a machine.
- Tie-ins and closure joints. The last joint in a pipeline, or the connection into an existing main, usually has pipe on both sides that cannot be moved. This is the classic job for a coupler.
- Branch connections. A saddle or tapping tee lets you add a service or branch to a pipe that is already laid.
- Tight trenches, valve pits and wall penetrations. If a butt-fusion carriage physically cannot fit, electrofusion is the practical method.
- Mismatched wall thickness. Butt fusion is meant for pipes of the same diameter and wall. Where the walls differ, PIPA’s guidance, as summarised by a supplier, points to electrofusion, mechanical fittings or the manufacturer. Check the fitting maker’s compatibility table for the wall range each fitting accepts.
- Coiled or awkward small pipe. Coiled pipe often arrives oval, and one fitting maker notes that ovality is greater in coils, in higher SDRs and above 400 mm. Electrofusion works on these pipes once they are re-rounded with approved clamps. Our coil vs straight length guide explains the ovality issue.
When butt fusion still wins
- Long, straight runs. Joining pipe to pipe uses no fitting, so the joint count does not add to your bill. A 1,000 m main in 12 m lengths has about 83 joints, as we showed in our coil guide. Electrofusing all of them would mean buying 83 couplers; butt-fusing them buys none.
- Larger diameters where couplers become heavy, expensive and demanding on power.
- Full-bore flow. A butt-fused joint has no internal step or coupler stop.
- Visible quality evidence. A butt joint shows its bead, and a data-logging machine records each joint.
How to make a good electrofusion joint
The steps below follow general guidance from fitting makers and PIPA. Your fitting’s own instructions always come first.- Prepare the site. Work in a clean, dry, dust-free area under a shelter. Dust, rain and moisture on the joint surfaces reduce joint quality.
- Check the pipe. Look for damage, cut the pipe square, and measure the outside diameter. If the pipe is oval, re-round it with approved clamps.
- Pre-clean. Wipe off loose dirt. Wipes are not the final preparation step.
- Mark the insertion depth. Mark the fitting’s insertion depth plus about 25 mm on the pipe, so you know how far to scrape.
- Scrape the pipe surface. Remove the oxidised outer layer with a scraper (rotary tools are preferred for sockets, hand scrapers for saddles). Do not remove more than needed, and do not touch the scraped surface. Join without delay, because the surface contaminates quickly.
- Keep the fitting in its packaging until the moment you use it.
- Insert and clamp. Push the pipe fully to the stops and fit alignment clamps. Saddles need a calibrated top-loading clamp.
- Set up the control unit. Scan or enter the fitting’s data, check the leads and terminals, and make sure the power supply can last the full cycle. Check the generator’s fuel first.
- Run the cycle without interruption. If the generator runs out of fuel part-way, stop; never run a second cycle on the same fitting. Let it cool and cut the fitting out.
- Cool, inspect and record. Leave the clamps on for the whole cooling time and do not pressure-test until it has passed. Check that the fusion indicators are raised and that no melted material has squeezed out beyond the fitting’s edges. Keep the joint record, then pressure-test the line (see our HDPE testing guide).
Why electrofusion joints fail
The causes are consistent across training standards and manufacturers’ guidance:- Skipped or poor scraping, dirt, grease, moisture or a surface left exposed too long.
- Poor alignment or no clamps. Movement during heating or cooling changes the gap and the pressure.
- Out-of-round pipe. An oval pipe leaves a gap on one side of the fitting.
- Incomplete insertion or the wrong depth.
- Wrong fusion data or power problems. An incompatible control unit, wrong settings, or a generator that cannot hold the voltage.
- Moving or stressing the joint early, or pressure-testing before the cooling time has passed.
Standards, traceability and the tools that help
- Electrofusion fittings are covered by the fittings parts of the PE pipe standards: ISO 4427-3 for water and ISO 4437-3 for gas.
- Control units. ISO 12176-2:2025 sets performance requirements for electrofusion control units. Its scope notes that units designed for only one brand of fittings are outside the standard, so confirm that your control unit and your fittings are compatible before the job.
- ISO 12176-3 defines the format of the operator’s badge, which identifies the operator and can activate or deactivate the equipment. ISO 12176-4 covers traceability coding, and ISO 12176-5 the data format and retrieval. Together they make it possible to record who made which joint, when and with what settings. Fitting makers recommend that the joint record be retrievable and that each joint be marked with its reference.
Practical points for Pakistan
These are our suggestions rather than cited rules:- Heat and dust. Keep fittings in their bags and in the shade, use a shelter against dust and sun, and use fittings with barcode times so the control unit can adjust for ambient temperature.
- Trench water. Pipe and fitting surfaces must be dry. In monsoon conditions, dewater and shelter the joint before you start.
- Size the generator on the fitting maker’s advice, and check fuel before starting each cycle. A failed cycle means a wasted fitting.
- Choose crews trained on the specific system. Fitting makers state that installers must be competent and trained for the jointing method.
- Keep a few repair couplers in common sizes in the site store. The right fitting in a damaged-main emergency saves a day.
- Matching equipment. Buy fittings and a compatible control unit from the same supplier, and ask for the fusion instructions in writing.
Cost: count per joint and per excavation
Electrofusion costs more per joint than butt fusion because every joint uses a fitting. Butt fusion costs more in equipment and crew skill. The sensible way to decide is to count both:- If a joint can be made in a machine above ground, butt fusion avoids a coupler.
- If making the same joint would mean digging a wider trench, closing a road or shutting the water for a day, a coupler is cheap by comparison.
A quick checklist before you choose
- Can the pipe ends be lined up in a machine? If not, choose electrofusion.
- Is it a repair, tie-in or branch? Choose electrofusion.
- Do the pipe walls match? If not, choose electrofusion or a mechanical fitting.
- Is it a long run of matching pipe? Choose butt fusion.
- Is the pipe a small service line? Consider compression fittings (see our comparison).
- Do you have a compatible control unit, a generator and trained operators? If not, plan for them before the job.