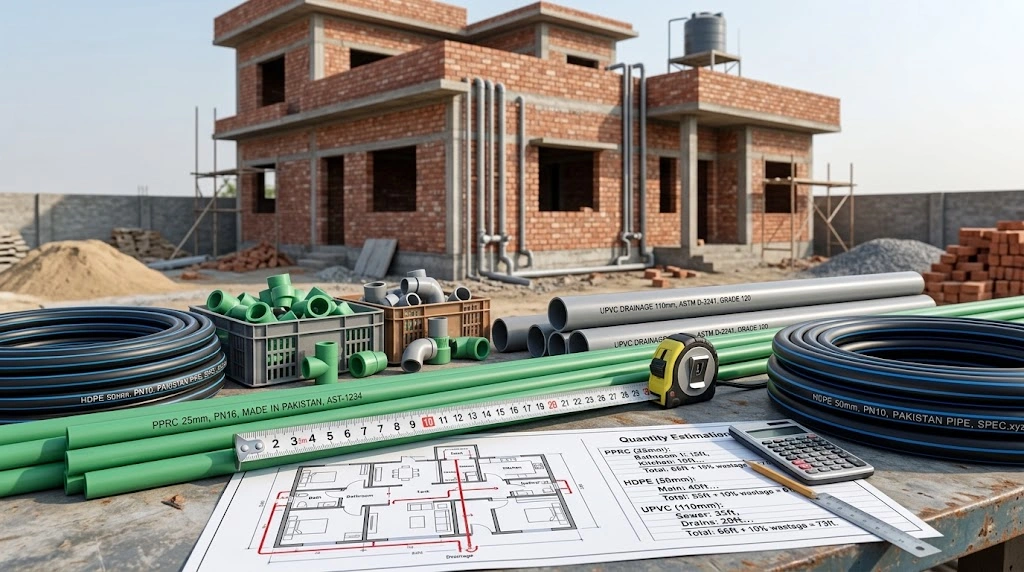
Ordering pipes for a house construction project in Pakistan is often based on rough estimates. A contractor may review the layout, add some extra pipe, and assume more can be purchased from the local hardware market if the supply runs short. This can lead to delays when there is not enough pipe for an installation, or unnecessary costs from unused coils and leftover offcuts. Knowing the pipe quantity for house construction helps reduce this guesswork and makes material planning more accurate. This guide explains a practical room-by-room method for estimating water supply and drainage pipe requirements, highlights common mistakes that can affect the estimate, and shows how choosing different pipe materials can change the final quantity you need to order.
Why Getting Pipe Quantity Right Matters
On a typical residential plot, the cost of pipes is relatively small compared with cement or steel, but running out of pipe during installation can cause delays that are far more costly than the material itself. Plumbing is often completed after the walls are built and sometimes after tiling has already begun, so even a missing length of PPRC or UPVC pipe can keep a plumber waiting for an entire day or lead to an unsuitable joint made with whatever size is available locally. Ordering too much pipe also creates unnecessary expense, as unused lengths are not always easy to return, while odd pieces of HDPE or UPVC may be difficult to reuse on another project. Preparing an accurate Pipe Requirement for Construction Estimate before the plumbing work begins helps avoid both shortages and waste while giving you a practical quantity to include in your construction budget.
.
Step 1: Map Out Every Plumbing Point in the House
Before any calculation, sketch a simple layout of the house — it doesn’t need to be to scale. Mark every point that needs a water or drainage connection:
- Kitchen sink and, if applicable, a dishwasher or RO unit connection
- Each bathroom: basin, commode, shower, and geyser (hot water)
- Washing machine point and outdoor tap(s)
- Overhead tank inlet/outlet and underground/boring water source
- Motor connection point, if a water pump is installed
- Floor drains, roof rainwater outlets, and the sewerage connection to the street line
For a double-story house, repeat this for each floor and note where vertical risers will run — these vertical runs are the part most estimates forget, and they add real length once you’re calculating floor-to-floor distances rather than just room widths.
Step 2: Know the Standard Pipe Size and Type for Each Line
Different fixtures use different pipe classes and diameters. Getting this table right before ordering prevents buying the wrong size and having to return it:
Application | Common Pipe Type | Typical Size |
Main supply line (tank to house) | UPVC or HDPE | 25mm–32mm (1″–1.25″) |
Branch lines to bathroom/kitchen | PPRC (cold water, PN-10/16) | 20mm–25mm |
Hot water lines (geyser feed) | PPRC (PN-20/25, heat-rated) | 20mm |
Sewerage main line | UPVC (Class B or higher) | 100mm (4″) |
Sewerage branch/waste lines | UPVC | 50mm (2″) |
Rainwater downpipe | UPVC | 75mm–100mm (3″–4″) |
PPRC is the standard choice for hot and cold water supply inside Pakistani homes because it handles higher temperatures without deforming; UPVC is generally reserved for drainage, sewerage, and cold-water-only lines HDPE is more common for the underground or rising-main section between a borewell/tank and the house, where its coil form reduces the number of joints.
NewTech Pipe Catalogue
NewTech Pipes · Piping Systems Catalogue
Know your sizes and pipe types? Look through NewTech’s PPRC, UPVC and HDPE range before you finalise the order.
Step 3: Estimate Length Per Fixture, Then Add for Verticals and Wastage
For each line identified in Step 1, estimate the horizontal distance from the nearest supply/drainage point, then add the vertical rise if the line runs up a wall or between floors. A rough example for a single-story, 5-marla house with two bathrooms and a kitchen:
Line | Pipe & Size | Estimated Length |
Main supply (tank to house) | UPVC/HDPE 1″ | 35–40 ft |
Bathroom 1 branch (cold + hot) | PPRC 20mm | 40–50 ft combined |
Bathroom 2 branch (cold + hot) | PPRC 20mm | 40–50 ft combined |
Kitchen branch | PPRC 20mm | 15–20 ft |
Sewerage main to street connection | UPVC 4″ | 30–40 ft |
Sewerage branches (bathrooms + kitchen) | UPVC 2″ | 35–45 ft |
Once every line is estimated, add 10–15% on top of the total for cutting waste, bends, and fitting allowances — this is the single most commonly skipped step in a pipe requirement for construction estimate, and it’s the reason contractors run short even when their measurements were correct.
Sewerage and Drainage: Why the Calculation Works Differently
Water supply lines can usually run in a fairly direct path, but drainage and sewerage lines need a continuous downward slope to function, which often means routing around beams, footings, or other lines rather than in a straight line. This typically adds 10–20% more length than a simple point-to-point measurement would suggest. Sewerage lines also use proportionally more fittings — bends, tees, and inspection chambers — relative to their pipe length, so budget for fittings separately rather than assuming they’re a rounding error on top of the pipe cost.
Common Mistakes That Lead to Buying Too Little or Too Much
- Measuring only floor-plan distances and forgetting vertical risers between floors or up to an overhead tank
- Skipping the 10–15% wastage allowance for cuts, bends, and joint overlap
- Ordering only for the current construction phase and not allowing for a planned future floor or room extension
- Mixing pipe classes or brands on the same pressure line, which can create fitting mismatches and force re-purchases mid-project
- Not separating the sewerage/drainage estimate from the water supply estimate, since the two use different diameters, materials, and wastage margins
How Pipe Material Affects Your Quantity Calculation
Material choice changes more than durability — it also changes how many joints your calculation should account for. HDPE typically comes in long coils (50m or 100m rolls for smaller diameters), which means fewer joints across a long underground or rising-main run and slightly less wastage. PPRC and UPVC are generally supplied in standard 3–4 meter lengths, which means more joints on longer runs and a higher cutting-waste percentage. When comparing quotes or supplier options, factor this in: a slightly higher per-meter cost on a coiled pipe can offset the labor and fitting cost of extra joints on a segmented one.
When to Get a Bill of Quantities (BOQ) From Your Supplier or Contractor
The room-by-room method above works well for a single-story home or small addition. For a multi-story house, a commercial building, or any project where plumbing runs are complex, it’s worth asking your contractor or pipe supplier for a formal Bill of Quantities (BOQ) based on the approved architectural and plumbing drawings. A proper BOQ accounts for exact fitting counts, riser heights, and code-compliant slope requirements — details that a rough estimate can’t capture reliably once a project moves beyond a simple layout.
Conclusion
Calculating pipe quantity accurately isn’t complicated once the plumbing points are mapped and standard sizes are known — it just requires accounting for vertical runs, wastage, and the different rules that apply to sewerage versus supply lines. Getting this right before construction starts avoids both mid-project delays and wasted budget on unused pipe. For projects where the layout is more complex, ISO 9001:2015-certified, PSQCA-registered manufacturers like Newtech Pipes can help contractors and homeowners cross-check quantity estimates against real product specifications before an order is placed.
Frequently Asked Questions
Q1. How many meters of pipe does a typical house need?
It depends heavily on house size, number of floors, and number of bathrooms, but a single-story 5-marla home with two bathrooms and a kitchen typically needs roughly 60–75 meters of combined water supply pipe and 30–40 meters of sewerage pipe, before adding the 10–15% wastage allowance.
Q2. Should I always order extra pipe as a safety margin?
Yes — a 10–15% margin on top of your calculated length is standard practice to cover cutting waste, bends, and minor layout changes discovered during installation. Ordering significantly more than that usually just leaves unused stock, since most residential pipe purchases are project-specific.
Q3. Can I mix pipe brands or pressure classes on the same line?
It’s best avoided. Different brands can have slightly different fitting tolerances, and mixing pressure classes (for example PN-10 and PN-16 on the same hot water line) risks a weak point in the system. Stick to one brand and one class per continuous line.
Q4. Do I need to calculate HDPE and PPRC quantities differently?
The calculation method is the same — map the run, measure the length, add wastage — but because HDPE is supplied in long coils and PPRC in short fixed lengths, the wastage percentage and number of joints will differ. Coiled HDPE runs typically need a slightly smaller wastage allowance.
Q5. How do I calculate sewerage pipe length separately from water supply?
Map the sewerage and water lines as two separate systems from the start, since they use different diameters, materials, and slope requirements. Add roughly 10–20% extra length to the sewerage estimate specifically to account for the routing needed to maintain a continuous downward slope.